by Howard Jancy, CSI, CDT
It is lurking there, hidden, out of sight. Waiting. It is lurking there, unmoving, seemingly harmless. Waiting. It is lurking there, waiting for some obscure moment to finally reveal itself, and when it does…It is too late. You cannot stop it. Damage will be done. What is it? It is the poorly prepared concrete substrate underneath your failed tiled floor.
Once the damage starts, thoughts about what should have been done prior to the tiles’ installation are quickly dimmed by the impending tear out and replacement project on the horizon.
The weak link
Inadequate substrate preparation is the Achilles’ heel of any tile floor installation. There is often a thought that surface preparation can be casually omitted without consequence, since no one will ever know once the concrete is covered by a membrane, mortar, and tile. No one will know until tiles start to delaminate or crack, and grout starts to crumble. Regardless of the quality of the setting materials and tiles, it is really the quality of the methods and materials used to address the substrate’s deficiencies that dictate the functional and aesthetic longevity of a tile floor. The omission is often driven by several factors.
Substrate evaluation
An inaccurate or incomplete assessment of a substrate’s deficiencies is made, particularly when an existing floorcovering is still in place when the specification is written, or the project is bid. As a result, the flooring subcontractor only includes minor surface preparation in the bid, which normally does not include extensive flattening of the substrate.

Construction delays
As delays compress the construction schedule, the general contractor (GC) or project owner is looking (demanding) for ways of expediting the floor’s installation by eliminating substrate preparation.
Value engineering
As the construction schedule is compressed, so too is the project’s budget. Consequently, substrate preparation is value-engineered out of the floor installation.
Time and money
The flooring installer, aware of these potential speed bumps to a timely and profitable installation, chooses to flatten the floor by applying additional tile bonding mortar during tile installation for the purpose of smoothing a substrate, rather than including self-leveling underlayment in the bid. This creates additional problems, addressed later in the article.

What are the consequences?
Surface preparation is not a ‘new’ requirement for tile projects. However, the tile size has evolved over the last few years. Gauged porcelain tile panels now reach 1.5 x 3 m (5 x 10 ft) in dimension.
Large-format ceramic and stone tiles, greater than 380 mm (15 in.) on a side, require a keener eye when evaluating remedial treatment of a concrete substrate. Most importantly, are high/low points within the required tolerances, as defined by the American National Standards Institute (ANSI) A108.02, General Requirements: Materials, Environmental and Workmanship: For sub-floor surfaces, the maximum allowable variation for large-format tiles is no more than 3 mm (1/8 in.) in 3 m, and no more than 1.6 mm (1/16 in.) in 0.6 m (2 ft).
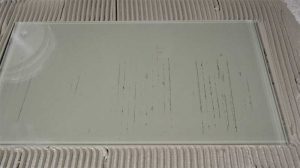
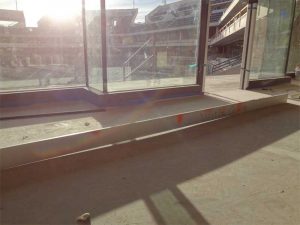
If substrate is not flattened prior to a tile installation, it would lead to several deficiencies in the finished floor, all of which are generally the result of inadequate mortar coverage. ANSI A108.5, Installation of Ceramic Tile with Portland Cement Mortar, defines proper mortar coverage as 80 percent for dry area installations and 95 percent for wet area installations. Coverage should be evenly distributed on the substrate as well as the underside of the tile to fully support it, particularly at the edges and corners. Though not required by ANSI, 95 percent mortar coverage should also be considered for stone tiled floors, since it is not as strong as ceramic ones. Further, both ceramic and stone installations are subjected to thermal cycling (Figure 1).
Mortar must be applied in a uniform thickness to ensure proper coverage and performance after a tile is embedded. Typically, as the installer combs the mortar with the correctly configured notched trowel, the trowel’s edge will follow the substrate’s contour between high and low spots. If the low spots, more than 3 mm in 3 m, are not filled or flattened, there is a greater likelihood of uncollapsed mortar ridges under the tiles. Uncollapsed ridges create voids, often located by the distinct hollow sound when the tile is tapped. They will cause the tiles to crack from either impact or rolling loads since the underside of the tile is unsupported by mortar. Attempts by the installer to correct for potential voids during tile installation often compound the problem.


